
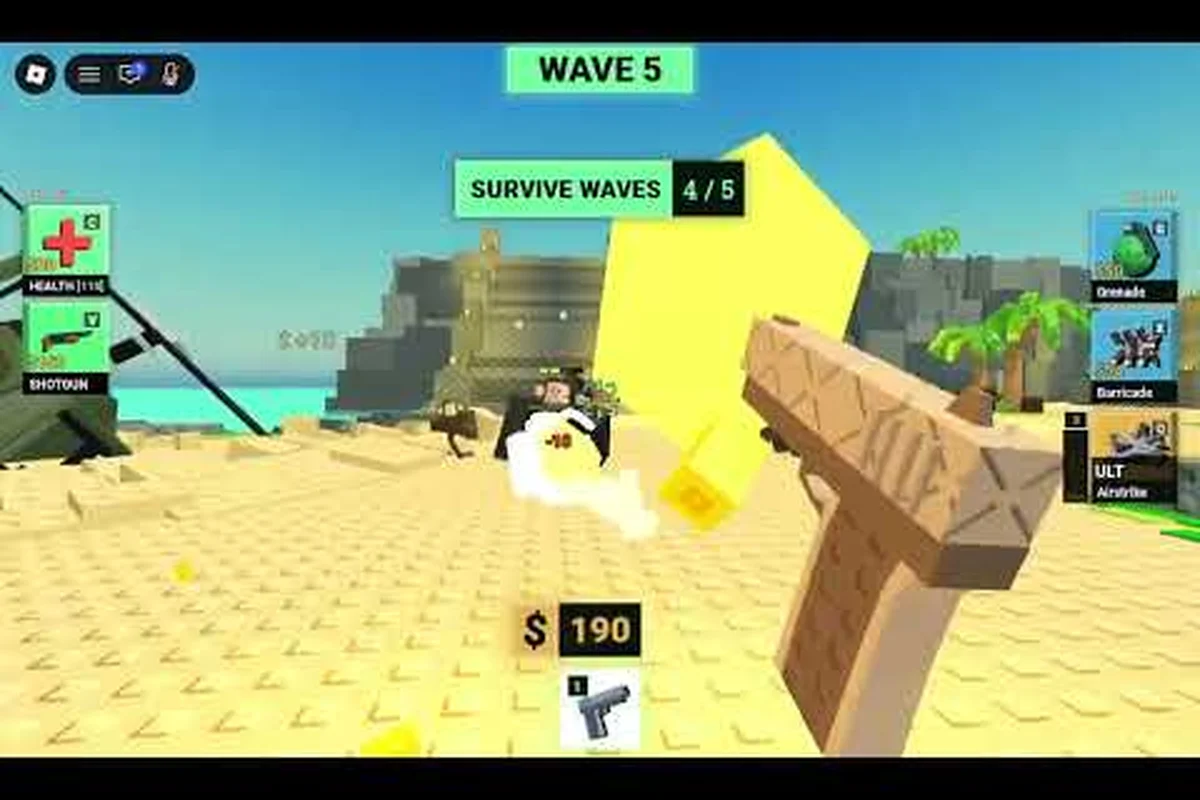
Understanding the split between survive a million monkeys gems and cash changes how you approach every single run, because one currency disappears when the wave counter resets while the other funds your permanent progression. If you have ever finished a deep run and felt unsure about what you actually earned, the distinction between in-run spending power and end-of-run payouts is the exact mechanic that clears up the confusion. This breakdown covers how each currency flows through a run, what the final reward screen calculates, and why farming efficient wave depths matters more than chasing a single lucky clear.
How the Two Currency Pools Actually Split
The core mechanic behind survive a million monkeys gems and cash is that these two resources never compete for the same job. Cash operates as a temporary, in-run spending pool that resets every time you start a new attempt, while gems function as the permanent meta-progression currency that persists in the hub between runs. According to the official Roblox page for the game, cash is spent on upgrades during a run, and gems are earned at run end based on wave count before being spent in the hub to unlock classes and weapon tiers. That separation means a run can feel successful even if you burn every last dollar of cash on a final upgrade, because the gem payout is calculated from your wave depth rather than your remaining wallet.
The reason this distinction trips up new players is that both numbers appear on the same HUD during a run. You see cash ticking upward as you clear waves, and you might assume that total carries into your permanent balance. It does not. When the run ends, the cash number is discarded, and the game calculates a separate gem reward using the wave count you reached. This is why experienced players stop hoarding cash in the late game, because unspent cash provides zero value once the reward screen appears.
| Currency | When It Resets | Primary Use | Persists Between Runs |
|---|---|---|---|
| Cash | Every new run | In-run upgrades and temporary boosts | No |
| Gems | Never (spent in hub) | Unlocking classes, weapon tiers, permanent upgrades | Yes |
The table above shows why the two currencies should never be treated as interchangeable. A player who saves 2,000 cash expecting it to convert into gems is making a fundamental mistake that slows down their meta-progression. The game deliberately forces you to make spending decisions during the run, because cash only has value while the wave timer is still active.
Why Cash Feels More Abundant Than It Really Is
Cash drops frequently from defeated monkeys, which creates the illusion that it is the primary reward. In reality, cash is a pacing tool that lets you keep up with escalating enemy health and density. The drop rate is tuned so that you can afford incremental upgrades every few waves, but the amounts are never large enough to let you skip meaningful decisions. Community testing suggests that cash income scales with wave depth, but the cost of upgrades scales faster, which means your spending efficiency matters more than your total income.
This design explains why survive a million monkeys how cash works is less about farming and more about timing. You want to spend cash on upgrades that pay off immediately, because a delayed purchase might arrive too late to save a run that is already spiraling. The best players treat cash as a resource with an expiration date, not a savings account.
What End of Run Rewards Actually Pay Out
The phrase survive a million monkeys end of run rewards refers specifically to the gem payout that appears after your run concludes, whether you die or voluntarily end the attempt. This payout is the only part of the run that carries forward, and it is calculated from the highest wave you reached rather than the number of monkeys you killed or the cash you accumulated. The official game page confirms that gems are earned at run end by wave count, which means your reward is a function of depth, not playtime.
A common misconception is that longer runs always produce better rewards. While deeper waves do increase the gem payout, the relationship is not linear, and the time investment required to push from wave 40 to wave 50 might not justify the marginal gem increase. This is where the concept of survive a million monkeys run rewards becomes a strategic calculation instead of a simple "go as far as possible" instruction.
| Run Outcome | Wave Reached | Approximate Gem Payout | Efficiency Rating |
|---|---|---|---|
| Early death | 1-10 | Low | Poor |
| Mid-game exit | 11-25 | Moderate | Good |
| Deep push | 26-40 | High | Strong |
| Overtime grind | 41+ | Very high | Diminishing |
The efficiency rating in the table reflects community reports that the gem-per-minute ratio peaks somewhere in the mid-game range for most players. Pushing into overtime waves can still be worth it if you are close to unlocking a specific class, but it is rarely the best use of your time if you are farming gems across multiple runs.
Reading the Reward Screen Without Guessing
When the run ends, the reward screen shows your wave count and the resulting gem payout. There is no hidden multiplier based on remaining cash, kill count, or damage dealt, which means the screen is simpler than many players expect. The formula rewards consistency, and understanding that formula is the key to planning your runs.
The survive a million monkeys gem reward formula is not published as an exact equation by the developer, but community testing has established a reliable pattern. The payout increases with each wave cleared, with larger jumps at milestone waves. Players report that the increase is roughly linear within a wave bracket, with occasional bonus spikes at thresholds like wave 10, wave 20, and wave 30. This means the difference between wave 19 and wave 20 is often larger than the difference between wave 18 and wave 19.
The Gem Reward Formula in Practice
Because the exact survive a million monkeys gem reward formula is not officially documented, the community has reverse-engineered the general shape of the curve. The formula appears to be based on wave count with milestone bonuses, and the most important takeaway is that every wave you clear adds value, but the value per wave is not constant. This is why experienced players track their wave depth carefully and adjust their run length based on what they are trying to unlock.
The practical application of this formula means you should set a target wave before each run. If you need 500 gems for a class unlock, you can estimate how many runs it will take based on your average wave depth. This turns gem farming from a vague grind into a predictable schedule, which is exactly what the survive a million monkeys rewards explained framework is designed to deliver.
| Wave Bracket | Payout Pattern | Best Use Case |
|---|---|---|
| 1-9 | Small, steady increases | Learning mechanics, testing builds |
| 10-19 | Milestone bonus at 10, then steady | Early gem farming |
| 20-29 | Milestone bonus at 20, larger base | Efficient farming window |
| 30-39 | Milestone bonus at 30, high base | Targeted unlocks |
| 40+ | Highest base, slow marginal gains | Pushing personal records |
This table is based on community data and may shift with balance patches, but the general structure has remained stable across recent updates. The key insight is that the mid-game brackets offer the best balance of time investment and gem return, which is why most farming guides focus on reaching wave 20-30 consistently rather than attempting deep pushes every run.
Why Milestone Waves Matter More Than Total Waves
The milestone bonuses in the gem formula create natural stopping points that players should respect. If you are struggling to reach wave 25, it is often better to end the run at wave 20 and start fresh, because the bonus at wave 20 represents a meaningful chunk of your total payout. Pushing from wave 20 to wave 24 without hitting the next milestone might add less value than simply starting a new run and reaching wave 20 again.
This insight connects directly to the broader survive a million monkeys gems and cash strategy, because it means your cash spending should be optimized around reaching milestone waves. If a cash upgrade helps you survive to wave 20, it is worth buying even if it leaves you with zero cash at the end, because the gem payout from hitting that milestone far outweighs the lost cash.
Spending Cash Wisely During a Run
The question of survive a million monkeys how cash works is really a question about opportunity cost. Every cash purchase is a trade-off between immediate survivability and the ability to afford a better upgrade later. Because cash resets at the end of every run, there is no reason to save it for a future that never arrives. The only exception is when you are close to a milestone wave and need to save for a specific upgrade that will carry you over the threshold.
The most effective cash spending pattern, according to community reports, is to prioritize upgrades that increase your damage output early, then shift to survivability upgrades in the mid-game. This is because early waves are forgiving enough that you can afford to invest in offense, while later waves punish you for lacking health or defensive tools. The transition point varies by class, but it typically falls somewhere between wave 10 and wave 15.
-
Early waves (1-10): Spend cash on damage upgrades to clear waves faster and build momentum.
-
Mid waves (11-25): Balance damage and survivability, with a slight lean toward health and defensive tools.
-
Late waves (26+): Prioritize survivability and utility, because enemy damage scales faster than your health pool.
-
Milestone pushes: Save cash for a specific upgrade that will help you survive the next milestone wave.
This spending framework ties directly into the cash upgrades guide, which breaks down upgrade priorities in more detail. The key principle is that cash should always be working for you in the current run, never sitting idle in anticipation of a conversion that will never happen.
Common Cash Mistakes That Cost You Gems
The biggest cash mistake is hoarding. Players who finish a run with 1,500 unspent cash have effectively thrown away the value of that cash, because it converts to nothing at the reward screen. The second mistake is spending cash on upgrades that do not meaningfully change your survival odds, such as minor quality-of-life improvements when you are already struggling to stay alive. Every cash purchase should be justified by a specific survival or damage goal.
The third mistake is ignoring the connection between cash and gems. While cash does not directly convert to gems, spending cash effectively allows you to reach deeper waves, which increases your gem payout. This indirect relationship means that good cash management is actually a gem farming strategy, even though the two currencies never touch each other directly.
Building a Run Plan Around Both Currencies
The most effective players treat survive a million monkeys gems and cash as a single integrated system rather than two separate mechanics. They enter each run with a target wave in mind, a rough cash spending plan, and a clear understanding of what the gem payout will be if they hit their target. This level of planning turns the game from a reactive survival experience into a proactive farming operation.
A practical run plan might look like this: enter the run with a goal of reaching wave 25, spend cash aggressively on damage in the first 10 waves, shift to survivability between waves 11 and 20, and push for the wave 20 milestone bonus before deciding whether to continue or reset. If the run is going well, push for wave 25 and bank the higher payout. If the run is struggling, end at wave 20 and take the milestone bonus rather than risking an early death at wave 23.
| Planning Element | Before Run | During Run | After Run |
|---|---|---|---|
| Target wave | Set based on unlock goal | Adjust based on performance | Compare to actual |
| Cash budget | Rough spending categories | Spend on immediate needs | No carryover |
| Gem expectation | Estimate from wave target | Update as waves clear | Confirm on reward screen |
This table shows how the planning loop works across the three phases of a run. The goal is to make deliberate decisions at every stage, rather than reacting to whatever the game throws at you. The gem per run guide goes deeper into the math behind efficient wave targets, but the core principle is that planning beats improvisation.
Adjusting Your Plan When a Run Goes Sideways
No plan survives contact with a million monkeys, and the best players know when to abandon their target and salvage value from a bad run. If you are struggling before wave 15, it is often better to end the run early and preserve your mental energy for the next attempt, because the gem payout from a wave 12 exit is still meaningful and the time saved can be reinvested in a fresh run.
The flexibility to end a run early is one of the most underrated skills in the game. Many players feel compelled to push until they die, even when the run is clearly not going to reach the next milestone. Ending at a clean milestone wave, even if it is lower than your original target, is almost always better than dying one wave short of a bonus.
Frequently Asked Questions
Do gems and cash ever convert into each other?
No, the two currencies never convert. Cash is spent during runs on temporary upgrades and disappears when the run ends, while gems are earned at run end based on wave count and persist in the hub. This separation is a core design choice that forces players to make in-run spending decisions without worrying about losing permanent progression.
What is the best wave to stop at for gem farming?
Community testing suggests that wave 20-25 offers the best balance of time investment and gem payout for most players. The milestone bonuses at wave 20 and wave 30 create natural stopping points, and reaching wave 20 consistently across multiple runs usually outperforms a single deep push to wave 40.
Does remaining cash affect my gem reward?
No, remaining cash has zero impact on your gem payout. The reward is calculated from wave count only, which means unspent cash is wasted value. This is why experienced players spend cash aggressively throughout the run, because hoarding cash provides no benefit at the reward screen.
How accurate is the community gem reward formula?
The formula is based on community testing and may shift with balance patches, but the general pattern has remained stable. The payout increases with wave count, with larger jumps at milestone waves like 10, 20, and 30. Treat the exact numbers as estimates rather than fixed values.
Should I always push for the deepest wave possible?
No, pushing for maximum depth is often inefficient. The marginal gem increase from wave 40 to wave 45 may not justify the additional time and risk, especially if you could complete two shorter runs in the same window. Target milestone waves and reset when a run is clearly not going to reach the next bonus.